
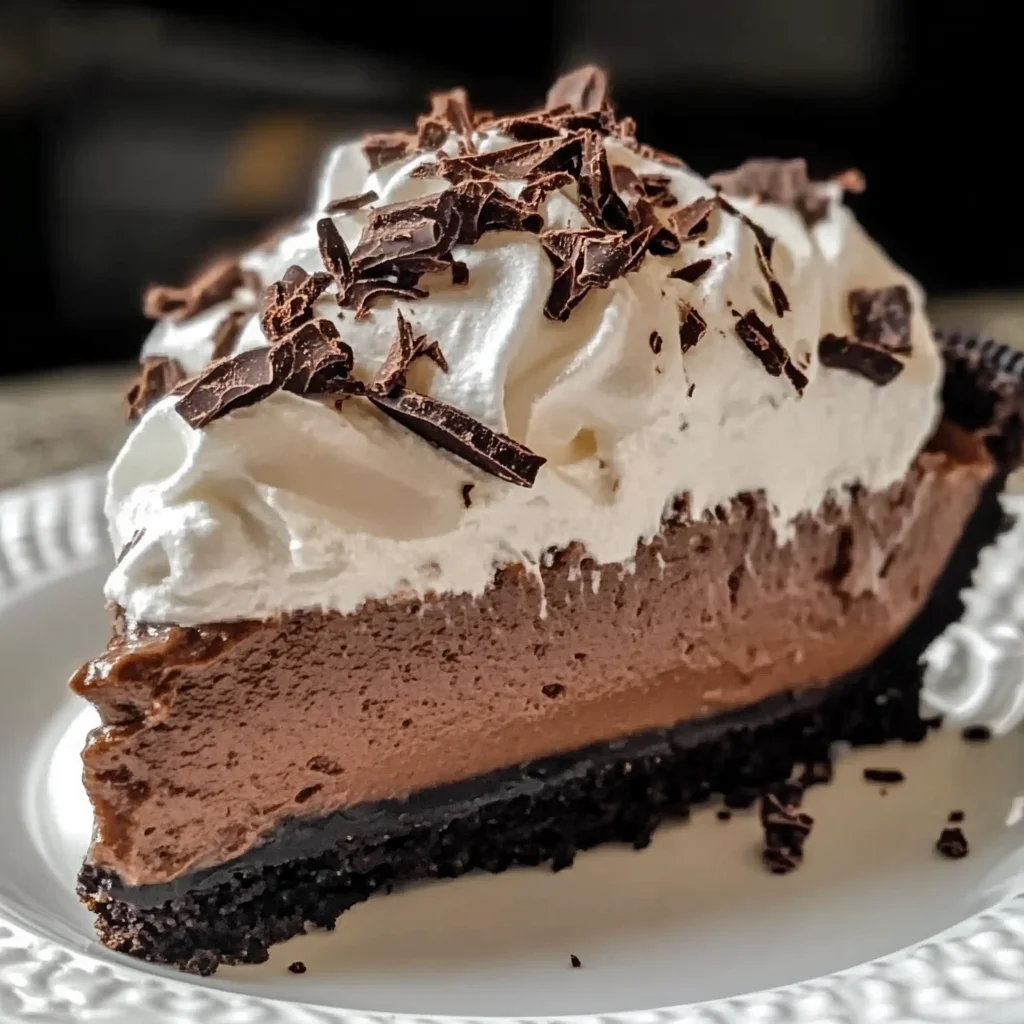
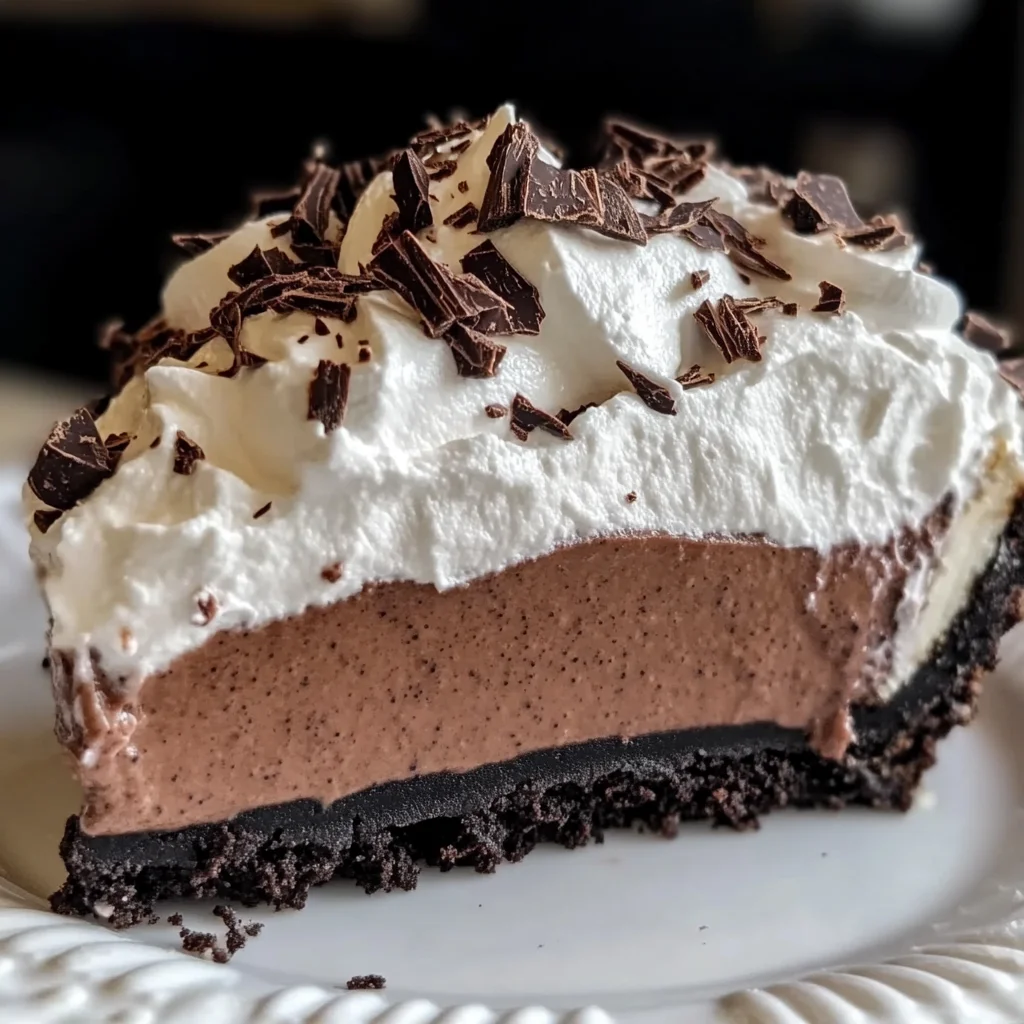
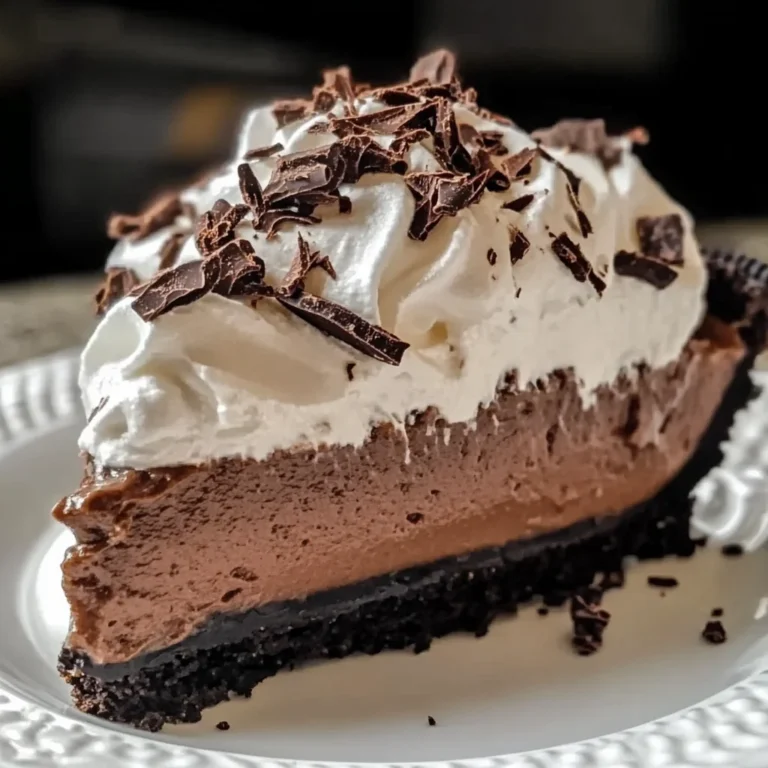
I’ve always been a fan of rich desserts, but French Silk Pie holds a special place in my heart. This recipe is a favorite at gatherings and family events for its smooth chocolate filling and easy-to-make crust. After trying various methods, I found the perfect combination of textures and flavors that keeps everyone coming back for more. In this article, you’ll find step-by-step instructions to create your own delicious pie at home.
Why You’ll Love This Recipe
- Creamy texture — The filling is silky smooth, making each slice melt in your mouth.
- Decadent chocolate flavor — Rich bittersweet chocolate balances perfectly with the sweet whipped cream topping.
- Oreo crust — A delightful cookie base adds crunch and enhances the overall flavor profile.
- No raw eggs — This recipe uses a safe method without raw eggs, perfect for everyone to enjoy.
- Impressive presentation — Topped with whipped cream and chocolate shavings, it’s sure to wow your guests.
Ingredients You’ll Need
Main Ingredients:
French Silk Pie
- 20 Oreo cookies (230 grams) — forms the base with a crunchy texture
- 3 tablespoons unsalted butter (melted) — binds the cookie crumbs together
- 1 1/3 cups granulated sugar — sweetens the filling
- 8 ounces bittersweet baking chocolate (melted) — gives richness to the filling
- 10 tablespoons unsalted butter (room temperature) — adds creaminess and body
- 1 1/3 cups heavy cream (cold) — creates a light topping when whipped
Smart Substitutions:
* Instead of Oreos: Use graham crackers — this will make for a less intense chocolate flavor but still provide a nice base.
* Instead of heavy cream: Try coconut cream for a dairy-free version — it alters the taste slightly but adds an interesting twist.
Pro Tip: When measuring ingredients like sugar or flour, spoon them into the measuring cup instead of scooping directly. This prevents packing and ensures accurate measurements.
How to Make French Silk Pie
Quick Prep Checklist:
* Crush Oreo cookies into fine crumbs.
* Melt bittersweet chocolate on low heat until smooth.
Step 1: Prepare the Crust
Preheat your oven to 350°F (175°C). Crush Oreo cookies into fine crumbs using a food processor or by placing them in a zip-top bag and rolling over them with a rolling pin. They should resemble sand when done.
Tip: Be sure not to leave large chunks; they won’t bind well with the melted butter.
Step 2: Form the Crust
In a mixing bowl, combine crushed Oreos with melted butter. Mix until all crumbs are coated, then press this mixture firmly into a 9-inch pie dish evenly across the bottom and sides. Bake for about 10 minutes until set, then allow it to cool completely on a wire rack.
Watch For: The edges should be slightly firm but not overly browned.
Step 3: Melt Chocolate
In a small saucepan over low heat, melt bittersweet chocolate while stirring gently until completely smooth. Remove from heat and let it cool slightly before using; this helps prevent curdling when combined with other ingredients.
You’ll Know It’s Ready When: It’s glossy without any lumps remaining.
Step 4: Mix Filling
In a large bowl, beat room temperature butter and granulated sugar together until fluffy—this usually takes about 5 minutes. Add eggs one at a time, mixing well between each addition. Stir in cooled melted chocolate until fully incorporated.
Common Mistake: Adding hot chocolate directly can cause scrambled bits in your filling; ensure it’s just warm before adding.
Step 5: Assemble Your Pie
Pour the prepared filling into the cooled Oreo crust evenly. Cover with plastic wrap and refrigerate for at least four hours or overnight for best results—this allows flavors to meld beautifully as it sets.
When you’re ready to serve, whip cold heavy cream with powdered sugar until soft peaks form before spreading it over your chilled pie and garnishing as desired!
✅ Perfect Results Checklist:
* The crust is firm yet crumbly.
* The filling is silky without lumps.
* The whipped topping holds peaks without collapsing.
Expert Tips & Variations
3 Pro Tips:
* Room temperature ingredients: Always use room temperature butter and eggs; they blend better for smoother fillings.
* Chill mixing bowls: For best results when whipping cream, chill your mixing bowl beforehand—it helps achieve sturdier peaks quicker.
* Use quality chocolate: Opting for high-quality bittersweet chocolate makes all the difference in flavor—it’s worth it!
3 Variations to Try:
* Nutty Addition: Fold chopped nuts like pecans or walnuts into your filling for added crunch.
* Mint Chocolate Twist: Add peppermint extract along with melted chocolate for refreshing mint flavor throughout.
* Fruit-Enhanced Version: Top with fresh berries after adding whipped cream; their tartness contrasts nicely against sweet flavors.
Common Mistakes to Avoid
Mistake #1: Overbaking the Crust
Often I see crusts that are too hard because they were left in too long. Baking slightly longer can dry out moisture from cookies leading to an overly crisp texture instead of crumbly. Stick closely to baking times mentioned!
Mistake #2: Lumpy Filling
I learned that if my butter wasn’t softened enough initially, it caused lumps in my mixture during beating stages! Butter needs time outside fridge so be patient—this ensures everything incorporates smoothly.
Mistake #3: Skipping Chilling Time
Some home bakers rush through chilling steps thinking they’ll save time! If you don’t give adequate chill time after assembling pies properly set up won’t occur resulting messy slices later on—plan ahead!
Storage & Reheating
Room Temperature: Leftover pie can stay out for up to two hours before needing refrigeration due safety concerns regarding dairy products involved in toppings.
Refrigerator: Store covered tightly; it lasts up three days maximum while retaining quality if properly wrapped!
Freezer: Wrap tightly in plastic wrap followed by aluminum foil; store up six months frozen without losing much sweetness!
Reheating:
* Oven: Preheat oven at low temp (about 300°F) bake around ten minutes restores texture beautifully!
* Microwave: Use medium power level starting thirty seconds checking frequently avoiding overheating which can ruin top layer!
Frequently Asked Questions
How do I know when my pie is set?
Your creation will look firm around edges while still having slight jiggle center once cold enough—this indicates proper setting occurred during chilling process!
Can I make this pie ahead of time?
Absolutely! Preparing this dish one day prior actually enhances flavors further enhancing experience come serving day…
What does “silk” mean in silk pie?
The term refers specifically creamy texture achieved through beating techniques used here creating luxurious mouthfeel enjoyed by everyone who tries some!
Can I substitute any ingredients?
Yes! Many common swaps work well here including different types biscuits instead Oreos depending personal preference & dietary restrictions covering whichever situation arises…
Final Thoughts
This recipe delivers exactly what you’re craving—a rich dessert that satisfies every bite without overwhelming sweetness balancing everything perfectly together! You’ll find yourself making French Silk Pie again whenever you want something indulgent yet approachable at home or sharing during special occasions alike!
If you loved this recipe, leave me comments below—I read every one! Rate it ⭐⭐⭐⭐⭐ and share it with friends who need some delicious ideas too!
French Silk Pie
Indulge in the rich and creamy delight of French Silk Pie, where each slice melts in your mouth with its smooth chocolate filling and a crunchy cookie crust. The decadent bittersweet chocolate flavor combines beautifully with the light whipped topping, creating an irresistible dessert that will impress your guests. Customize it with your favorite toppings or mix-ins for a personal touch.
- Total Time: 35 minutes
- Yield: 8 servings 1x
Ingredients
- 20 Oreo cookies
- 3 tablespoons unsalted butter (melted)
- 1 1/3 cups granulated sugar
- 8 ounces bittersweet baking chocolate (melted)
- 10 tablespoons unsalted butter (room temperature)
- 1 1/3 cups heavy cream (cold)
Instructions
- Preheat your oven to 350°F (175°C). Crush the Oreo cookies into fine crumbs until they resemble sand.
- In a mixing bowl, combine the crushed Oreos with melted butter until all crumbs are coated. Press this mixture firmly into a 9-inch pie dish.
- Bake the crust for about 10 minutes until set, then allow it to cool completely on a wire rack.
- Melt the bittersweet chocolate over low heat, stirring gently until smooth and glossy, then remove from heat and let cool slightly.
- In a large bowl, beat room temperature butter and granulated sugar together until fluffy—about 5 minutes.
- Stir in cooled melted chocolate until fully incorporated, ensuring no lumps remain.
- Pour the prepared filling into the cooled Oreo crust evenly. Cover with plastic wrap and refrigerate for at least four hours to set.
- When ready to serve, whip cold heavy cream with powdered sugar until soft peaks form before spreading it over your chilled pie.
- Prep Time: 25 minutes
- Cook Time: 10 minutes
- Category: Dessert
- Method: Baking
- Cuisine: French
Nutrition
- Serving Size: 1 slice (116g)
- Calories: 410
- Sugar: 24g
- Sodium: 250mg
- Fat: 30g
- Saturated Fat: 18g
- Unsaturated Fat: 10g
- Trans Fat: 0g
- Carbohydrates: 36g
- Fiber: 2g
- Protein: 4g
- Cholesterol: 70mg