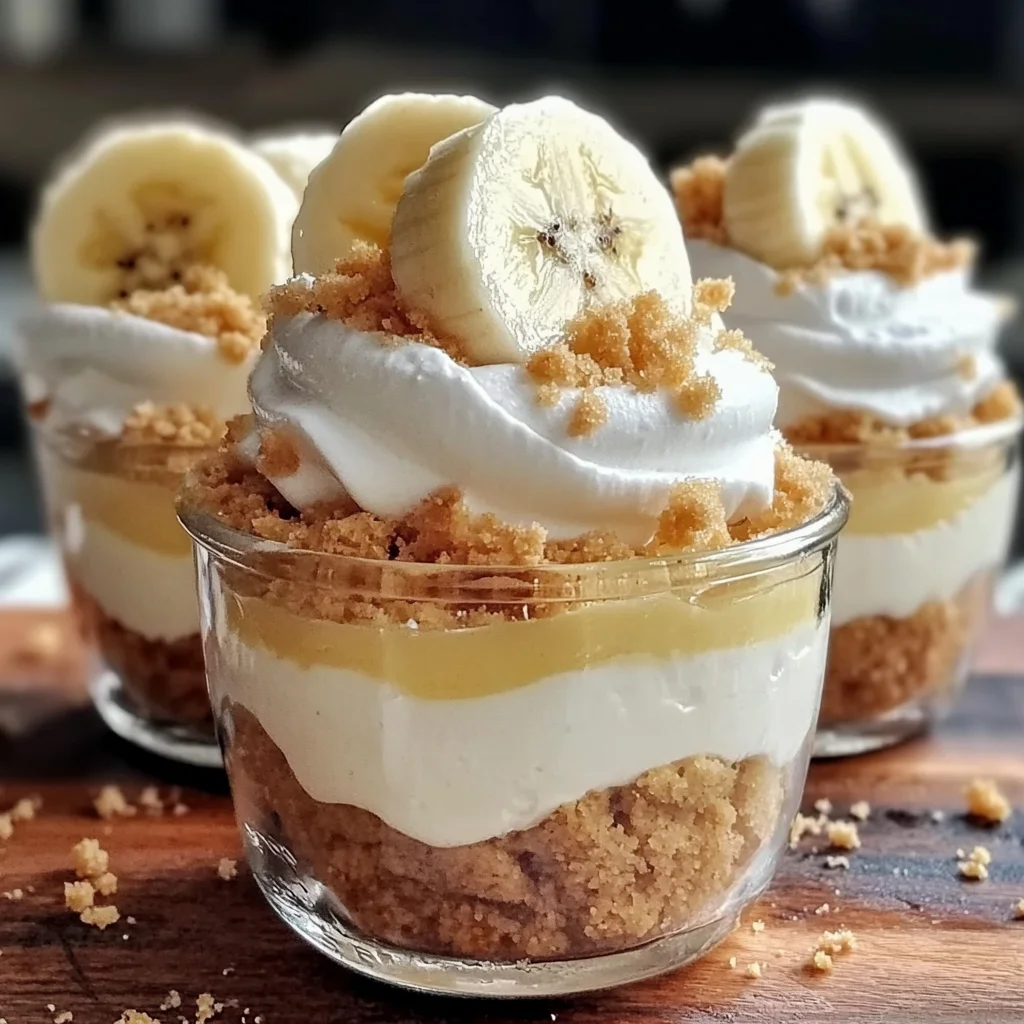
I’ve always loved the combination of creamy cheesecake and bananas, so creating a no-bake dessert version felt like a natural step. These Creamy No-Bake Banana Pudding Cheesecake Cups are exactly what I was aiming for — rich, satisfying, and super simple to make. After experimenting with different layering techniques, I discovered that adding fresh banana slices in the pudding mixture gives an extra burst of flavor without overwhelming the texture. In this article, you’ll find all the details to create your own batch.
Why You’ll Love This Recipe
- Quick Layering — Assemble these cups in just 30 minutes; no baking required.
- Perfect Texture — The creamy cheesecake pairs well with the smooth banana pudding, offering a delightful contrast.
- Flexible for Occasions — Great for busy weeknights or as a crowd-pleasing party dessert.
- Easy Cleanup — Since everything is made in individual cups, there’s minimal mess involved.
- Customizable Garnish — Add your favorite toppings like whipped cream or extra wafer crumbs for variety.

Ingredients You’ll Need
Main Ingredients:
– Vanilla wafer cookies — 1 ½ cups crushed; forms the crunchy base.
– Unsalted butter — 5 tablespoons melted; binds the cookie crumbs together.
– Cream cheese — 8 ounces softened; creates a smooth cheesecake filling.
– Powdered sugar — ¾ cup sifted; sweetens the cream cheese perfectly.
– Heavy cream — 1 cup cold; adds fluffiness when whipped.
– Vanilla extract — 1 teaspoon pure; enhances overall flavor profile.
– Instant banana pudding mix — 1 (3.4-ounce) box; thickens and flavors the pudding layer.
– Cold milk (whole or 2%) — 2 cups; needed to prepare the pudding mix.
– Ripe bananas — 1 cup sliced; adds fresh fruitiness to each cup.
– Additional crushed vanilla wafers or whole wafers for garnish.
– Whipped cream (optional) — for topping if desired.
– Thin banana slices or a sprinkle of cinnamon for garnish.
Smart Substitutions:
- Instead of heavy cream: Use coconut cream—this will give it a subtle coconut flavor while maintaining creaminess.
- Instead of vanilla wafer cookies: Try graham crackers—this will change the flavor slightly but still offers great texture.
Pro Tip: Always use softened cream cheese to avoid lumps in your filling. Let it sit at room temperature for about an hour before using.
How to Make Creamy No-Bake Banana Pudding Cheesecake Cups
Quick Prep Checklist:
- Crush vanilla wafers into fine crumbs
- Whip heavy cream until soft peaks form
Step 1: Prepare the Crust
Crush about 1 ½ cups of vanilla wafers until they resemble fine crumbs. Mix these with melted butter until they look like wet sand. Press about two tablespoons into each cup firmly. Chill them in the fridge while preparing your filling.
Tip: Use a flat-bottomed measuring cup to compact the crust evenly.
Step 2: Make Banana Pudding
In a medium bowl, whisk together one box of instant banana pudding mix with two cups of cold milk until thickened—about two minutes should do it. Fold in one cup of sliced ripe bananas gently so they don’t break apart too much.
Watch For: The pudding should be thick enough to hold its shape but not overly stiff.
Step 3: Prepare Cheesecake Filling
In a large bowl, beat softened cream cheese with sifted powdered sugar until smooth and creamy—this usually takes about three minutes with an electric mixer. In another chilled bowl, whip one cup of heavy cream with vanilla extract until soft peaks form then gently fold this whipped cream into your cheesecake mixture until fully combined and airy.
You’ll Know It’s Ready When: Everything looks light and fluffy without any lumps from the cheese.
Step 4: Assemble Layers
Spoon or pipe about half of your cheesecake mixture over each chilled crust layer in each cup, followed by a generous layer of banana pudding mix on top. Repeat this process if your cups are tall enough, finishing off with another dollop of cheesecake on top.
Be careful not to overfill since these can spill over easily!
Step 5: Final Touches
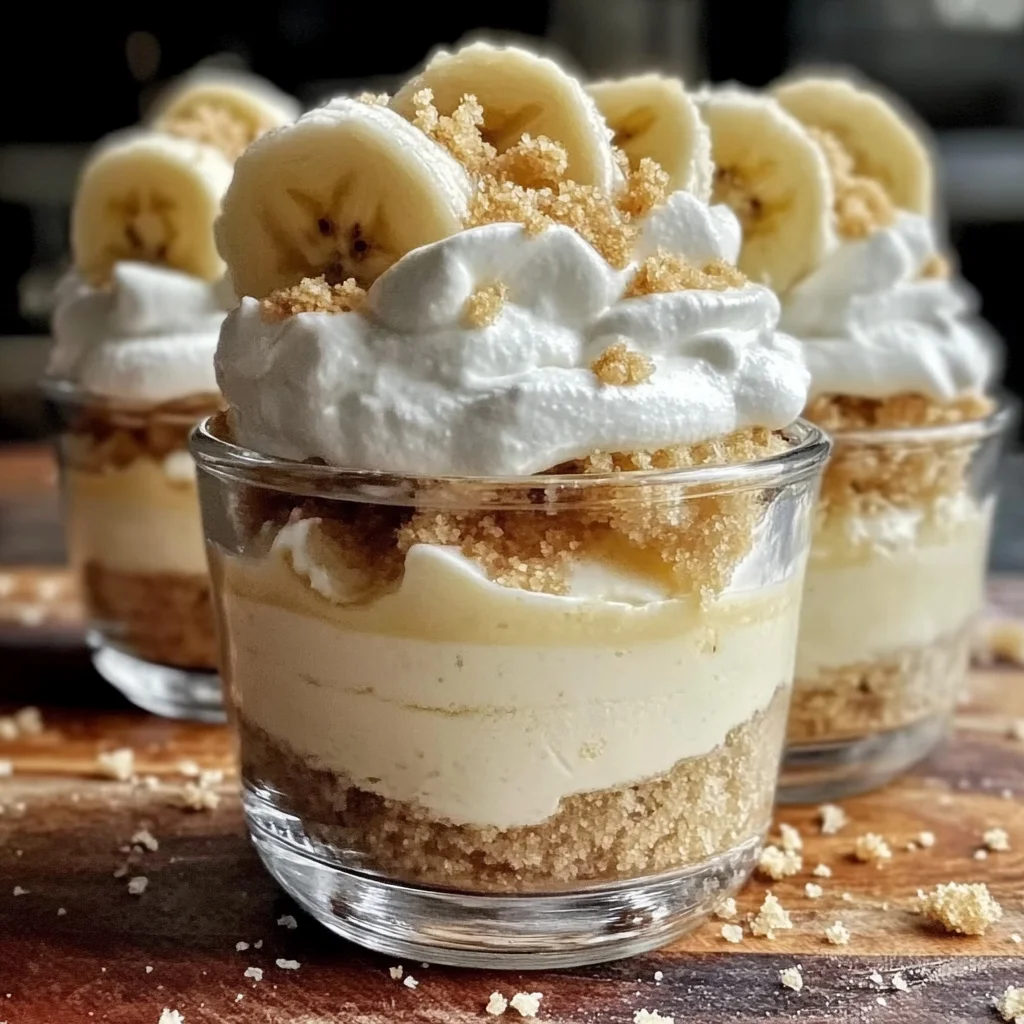
Sprinkle crushed vanilla wafers on top or place a whole wafer if you prefer visual appeal. You may add banana slices or whipped cream as finishing touches too! Chill these assembled cups for at least two hours before serving so they set nicely and flavors meld together perfectly.
Before serving, check if any edges look watery—just give them a gentle stir or refresh garnishes as needed.
✅ Perfect Results Checklist:
* Crust should feel firm and hold its shape when removed from cups
* Filling should be creamy but not runny
* Topping should appear light and inviting
Expert Tips & Variations
Pro Tips:
- Chill Your Bowls: For even fluffier whipped cream, chill your mixing bowls before whipping.
- Use Fresh Bananas Just Before Serving: If you want to prevent browning on bananas atop your dessert cups, add them right before serving.
Variations to Try:
- Chocolate Banana Version: Swap out some ingredients with chocolate pudding instead of banana pudding for a rich twist on this recipe.
- Nutty Crunch Appeal: Add chopped nuts between layers for additional crunch and flavor contrast.
Common Mistakes to Avoid
Mistake #1: Lumpy Cheesecake Mixture
Sometimes you may end up with lumps in your filling that aren’t pleasant when served. This usually happens when you use cold cream cheese straight from the fridge rather than letting it soften first. Ensure it’s at room temperature before mixing!
Mistake #2: Runny Pudding Layer
If your pudding doesn’t set properly, it can lead to messy layers that don’t hold up well during assembly. This often occurs due to improper mixing techniques or not allowing it enough time to thicken after whisking milk into it. Follow timing carefully during preparation!
Mistake #3: Soggy Crust
You might notice that after chilling some crusts lose their crunch and get soggy instead! This typically happens when wet fillings are added too early without proper chilling time beforehand which helps firm them up better first! Always ensure crusts have adequate time in fridge before layering toppings.
Storage & Reheating
Room Temperature: These shouldn’t sit out longer than two hours due to dairy ingredients involved here.
Refrigerator: Store leftover cups tightly covered for up to three days—ideal wrapped individually if possible!
Freezer: Wrap portions tightly in plastic wrap then foil before freezing—they can last up around two months!
Reheating:
* Oven: Not recommended since these should be enjoyed cold!
* Microwave: Use low power levels briefly just long enough so they soften slightly but still keep their structure intact!
* Stovetop: Avoid direct heat but consider using indirect heat methods while covered briefly on low flame just until warm-enough-to-eat temperatures achieved!
Frequently Asked Questions
Can I make these desserts ahead of time?
Yes! These can be prepared up to two days ahead which allows flavors time together nicely while ensuring convenience during serving day itself.
What can I substitute if I don’t have instant banana pudding mix?
You can make homemade custard as an alternative however results may vary regarding thickness compared store-bought mixes depending upon recipes used versus traditional boxed products available today!
How long do leftovers last?
If stored properly sealed within refrigerator containers leftovers remain safe-to-eat within three days maximum although freshest taste achieved within first couple days generally preferred by many home bakers alike!
Can I use different fruits instead?
Of course! Feel free experimenting using strawberries or berries as tasty substitutes providing similar textures alongside different fruity tastes altogether adding variety per occasion desired throughout year-end celebrations enjoyed universally among friends & families—all love good treats!
Final Thoughts
Creating these creamy treats satisfies both cravings for something sweet yet refreshing all at once! With such easy steps involved achieving perfect balance found within this recipe holds true across tasting experiences shared among family gatherings everywhere near summertime picnics outdoors down memory lane nostalgia invokes fond memories enjoyed around dining tables anytime soon thereafter!
Don’t hesitate trying out Creamy No-Bake Banana Pudding Cheesecake Cups yourself—you won’t regret diving into deliciousness shared here today!
Loved this recipe? Leave a comment below—I read every one! Rate it ⭐⭐⭐⭐⭐ and share it with a friend who’d love it.

Creamy No-Bake Banana Pudding Cheesecake Cups
Indulge in the delightful Creamy No-Bake Banana Pudding Cheesecake Cups that you can whip up in no time. The rich, velvety cheesecake filling pairs beautifully with the smooth banana pudding, creating a luscious treat that sings of sweet bananas and creamy bliss. As you take a bite, the contrasting textures will dance on your palate, leaving you craving more. Feel free to customize by adding your favorite toppings or using different fruits to make it your own.
- Total Time: 30 minutes
- Yield: 6 servings 1x
Ingredients
- 1 ½ cups vanilla wafer cookies, crushed
- 5 tablespoons unsalted butter, melted
- 8 ounces cream cheese, softened
- ¾ cup powdered sugar, sifted
- 1 cup heavy cream, cold
- 1 teaspoon vanilla extract
- 1 (3.4-ounce) box instant banana pudding mix
- 2 cups cold milk (whole or 2%)
- 1 cup ripe bananas, sliced
- Additional crushed vanilla wafers or whole wafers for garnish
- Whipped cream (optional)
- Thin banana slices or a sprinkle of cinnamon for garnish
Instructions
- Crush the vanilla wafers into fine crumbs and mix them with melted butter until it resembles wet sand. Press two tablespoons into each cup and chill in the fridge.
- In a medium bowl, whisk the instant banana pudding mix with cold milk until thickened, about two minutes. Gently fold in one cup of sliced ripe bananas.
- In a large bowl, beat softened cream cheese with powdered sugar until smooth. In another bowl, whip heavy cream with vanilla extract until soft peaks form, then gently fold it into the cheesecake mixture.
- Spoon half of the cheesecake mixture over each crust layer in the cups followed by a layer of banana pudding mix. Repeat if your cups are tall enough and finish with another dollop of cheesecake.
- Top with crushed vanilla wafers or whole wafers and add banana slices or whipped cream if desired. Chill for at least two hours before serving for flavors to meld.
- Prep Time: 30 minutes
- Cook Time: 0 minutes
- Category: Dessert
- Method: No-Bake
- Cuisine: American
Nutrition
- Serving Size: 1 cup (150g)
- Calories: 300
- Sugar: 15g
- Sodium: 200mg
- Fat: 20g
- Saturated Fat: 10g
- Unsaturated Fat: 8g
- Trans Fat: 0g
- Carbohydrates: 28g
- Fiber: 1g
- Protein: 4g
- Cholesterol: 50mg