
I’ve always enjoyed homemade desserts, and vanilla pudding has a special place in my heart. This recipe for Creamy Homemade Vanilla Pudding is a favorite of mine because it’s straightforward and incredibly rewarding. After trying various methods, I found the perfect balance of creaminess and flavor. In this article, you’ll discover how to make this delightful dessert that can be enjoyed warm or cold.
Why You’ll Love This Recipe
- Rich Flavor — Using pure vanilla extract adds depth, making every spoonful satisfying.
- Versatile Serving Options — Enjoy it warm for comfort or chilled as a refreshing treat.
- Simple Ingredients — Made with pantry staples, you can whip it up anytime without fuss.
- Customizable — Easily add fruits or toppings to match your taste preferences.
- Quick to Prepare — From start to finish, you can have this dessert ready in under 30 minutes.

Ingredients You’ll Need
Main Ingredients:
– 2 cups whole milk
– 1/2 cup granulated sugar
– 1/4 cup cornstarch
– 1/4 tsp salt
– 2 tsp pure vanilla extract
– 2 tbsp unsalted butter
Smart Substitutions:
- Instead of whole milk: Use almond milk — it creates a lighter pudding but may alter the creaminess slightly.
- Instead of granulated sugar: Try coconut sugar — it offers a richer flavor but may darken the final product.
- Instead of unsalted butter: Use coconut oil — it will change the flavor profile slightly but keeps the pudding dairy-free.
Pro Tip: Look for high-quality vanilla extract; it significantly enhances the flavor compared to artificial versions.
How to Make Creamy Homemade Vanilla Pudding
Quick Prep Checklist:
* Gather all ingredients before starting.
* Measure out your ingredients accurately for best results.
Step 1: Combine Dry Ingredients
In a medium saucepan, whisk together the sugar, cornstarch, and salt until fully blended. The mixture should feel smooth between your fingers.
Tip: Break up any lumps in the cornstarch for a silky pudding.
Step 2: Add Milk
Gradually whisk in the whole milk until smooth. The cool milk helps integrate the dry ingredients nicely, preventing clumping.
Watch For: The mixture should look lump-free and well combined as you whisk.
Step 3: Cook Over Medium Heat
Place the saucepan over medium heat and stir constantly as the pudding begins to thicken. This will take about 5–10 minutes.
You’ll Know It’s Ready When: The mixture bubbles gently and coats the back of a spoon.
Step 4: Add Vanilla and Butter
Once thickened, remove from heat and stir in vanilla extract along with butter until melted. This adds richness while creating a glossy finish to your pudding.
Avoid cooking too long after adding these ingredients; overcooking can affect texture.
Step 5: Cool and Serve
Pour into heatproof bowls or individual serving dishes. Cover with plastic wrap directly on top to prevent a skin from forming while cooling. Refrigerate until set, about 2 hours.
Don’t rush this step; allowing time in the fridge improves texture significantly.
✅ Perfect Results Checklist:
* Smooth surface without lumps after cooking.
* Thick enough to hold its shape when scooped.
* Mildly sweet aroma with hints of vanilla wafting through your kitchen.
Expert Tips & Variations
3 Pro Tips:
* Consistent Whisking: Keep stirring throughout cooking; this prevents sticking and ensures even thickening.
* Straining Option: Consider straining your pudding through a fine mesh sieve before chilling for an ultra-smooth texture.
* Flavor Boosts: Experiment with adding other extracts (like almond) for more complex flavors without overwhelming vanilla’s essence.
3 Variations to Try:
* Chocolate Pudding: Replace two tablespoons of cornstarch with cocoa powder for an easy twist on this classic dessert.
* Banana Cream Pudding: Layer sliced bananas between your pudding layers before chilling—great texture contrast!
* Caramel Swirl Pudding: Drizzle caramel sauce over each serving just before enjoying for added sweetness and richness.
Common Mistakes to Avoid
Mistake #1: Lumpy Pudding
I learned the hard way that lumps ruin smoothness. This typically happens from not breaking up cornstarch lumps initially or whisking inadequately while cooking. Always ensure you’ve mixed dry ingredients thoroughly before adding liquids.
Mistake #2: Overcooked Texture
Most home bakers miss that turning off heat at just right time is crucial; overcooking leads to graininess. This occurs because prolonged heat can break down starches too much. Remove from heat immediately when thickened—don’t wait!
Mistake #3: Skin Formation
You might find an unpleasant skin forms on top if left uncovered during cooling—a common issue I faced initially! This happens due to evaporation during cooling; covering directly helps prevent air exposure completely.
Storage & Reheating
Room Temperature: It’s best enjoyed fresh but can sit out for no longer than two hours if needed.
Refrigerator: Store covered in an airtight container for up to three days without losing quality.
Freezer: Wrap tightly in plastic wrap and then foil; freeze for about one month maximum freshness retention.
Reheating:
* Oven: Preheat oven at low temperature (about 300°F) for around 10 minutes just until warmed without risking curdling.
* Microwave: Set power level at medium—heat in short intervals (15–20 seconds), stirring between each until warm—but avoid overheating which ruins consistency!
* Stovetop: Use a non-stick pan over low heat; cover loosely with lid while stirring frequently helps retain moisture during reheating process effectively!
Frequently Asked Questions
How do I fix lumpy homemade pudding?
To fix lumpy pudding, use an immersion blender after cooking—it quickly smooths any lumps away without additional mess! If you don’t have one, strain through a fine sieve before serving instead.
Can I make this ahead of time?
Yes! You can prepare it up to three days ahead—just store in an airtight container in the refrigerator until you’re ready to serve it fresh again!
What are some variations I can try?
You could easily transform this recipe by mixing fruits like bananas or berries into layers or by turning it chocolate flavored by adding cocoa powder instead!
Will my pudding set if I use almond milk?
Using almond milk will yield slightly different results since it’s thinner than whole milk—but yes, it will still set nicely with proper adjustments made on heating times!
Final Thoughts
If you’re craving something creamy yet simple, you can’t go wrong with this recipe’s approach towards making delicious vanilla pudding from scratch! Your batch will impress not only yourself but also anyone lucky enough to share it with you.
Creamy Homemade Vanilla Pudding is truly worth making—so grab those ingredients today! I’d love hearing what you think—leave me comments below after trying out this recipe! Rate it ⭐⭐⭐⭐⭐ if you enjoyed and please share it with friends who would appreciate homemade desserts too!
Focus keyphrase: Creamy Homemade Vanilla Pudding
SEO title: Easy Vanilla Pudding Recipe: Quick & Simple Delight
Meta description: Discover how easy it is to make creamy homemade vanilla pudding using simple ingredients! Enjoy warm or cold—perfect timing treat!
Focus keyphrase synonyms: creamy homemade dessert recipes, how to make creamy vanilla pudding, quick vanilla custard recipe at home, best homemade puddings recipes, easy custard desserts made simply, rich homemade puddings ideas at home, simple recipes for delicious puddings

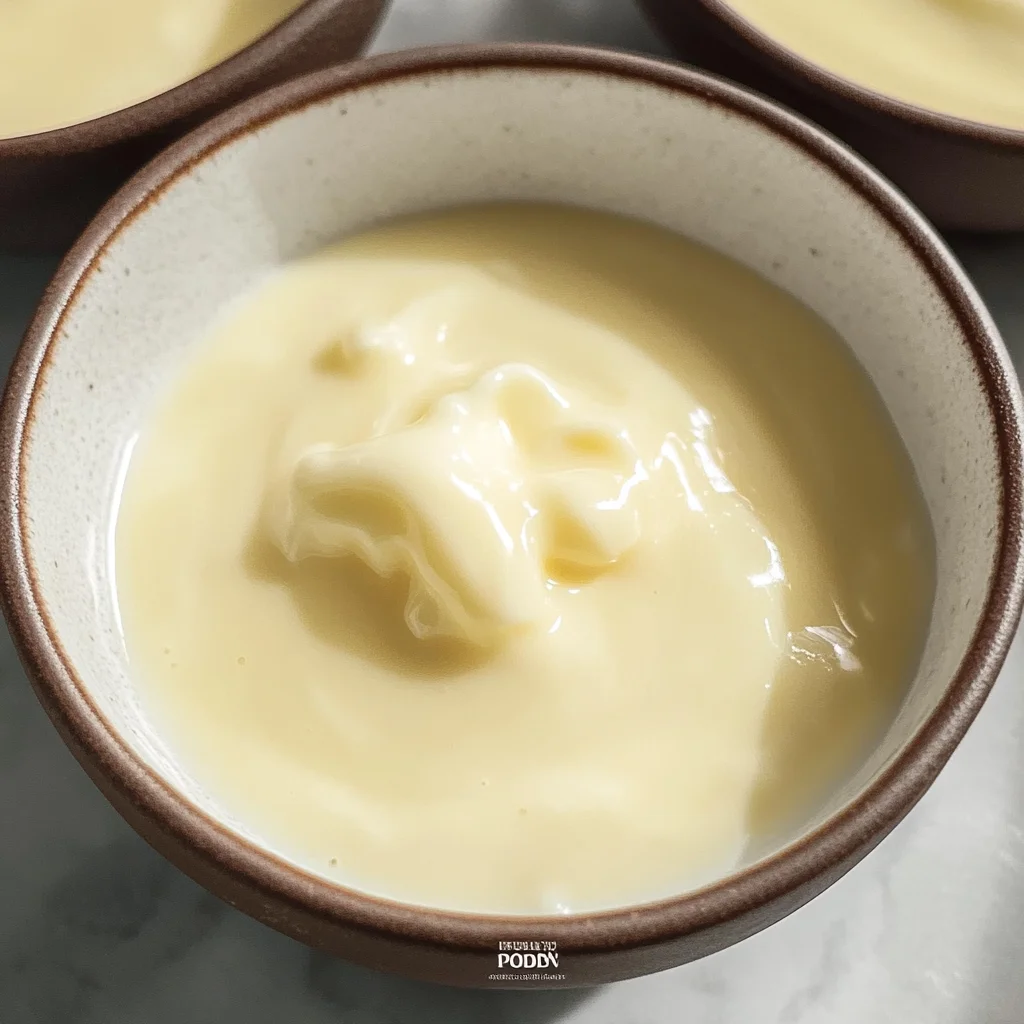
Creamy Homemade Vanilla Pudding
Indulge in the creamy, dreamy delight of homemade vanilla pudding that warms your soul with its rich, velvety texture and sweet aroma. Each spoonful is a satisfying experience, whether enjoyed warm or chilled. Feel free to customize this classic dessert by adding your favorite fruits or toppings for an extra layer of flavor.
- Total Time: 20 minutes
- Yield: 4 servings 1x
Ingredients
- 2 cups whole milk
- 1/2 cup granulated sugar
- 1/4 cup cornstarch
- 1/4 tsp salt
- 2 tsp pure vanilla extract
- 2 tbsp unsalted butter
Instructions
- In a medium saucepan, whisk together the sugar, cornstarch, and salt until fully blended, ensuring a smooth mixture.
- Gradually whisk in the whole milk until smooth, enjoying the coolness as it helps integrate the dry ingredients.
- Place the saucepan over medium heat and stir constantly as the pudding thickens for about 5–10 minutes until it bubbles gently.
- Once thickened, remove from heat and stir in vanilla extract and butter until melted, savoring the richness that develops.
- Pour into heatproof bowls or individual serving dishes and cover with plastic wrap directly on top to prevent a skin from forming while cooling. Refrigerate until set, about 2 hours.
- Prep Time: 10 minutes
- Cook Time: 10 minutes
- Category: Dessert
- Method: Cooking
- Cuisine: American
Nutrition
- Serving Size: 1/2 cup (120g)
- Calories: 180
- Sugar: 22g
- Sodium: 95mg
- Fat: 6g
- Saturated Fat: 4g
- Unsaturated Fat: 1g
- Trans Fat: 0g
- Carbohydrates: 28g
- Fiber: 0g
- Protein: 4g
- Cholesterol: 20mg