
I’ve always loved desserts that require minimal effort but deliver maximum flavor. This Easy No-Bake Patriotic Strawberry Icebox Cake fits that bill perfectly. After testing various whipped cream and berry combinations, I found the right balance for a light yet satisfying treat. In this article, you’ll discover how to make this delightful dessert that’s perfect for summer gatherings or any festive occasion.
Why You’ll Love This Recipe
- Perfectly Creamy Texture — The layers of whipped cream and softened wafers create a smooth mouthfeel that balances well with fresh strawberries.
- Fresh Fruit Flavor — Using ripe strawberries ensures each bite bursts with natural sweetness, making it a refreshing option for warm days.
- No Baking Required — You can assemble this dessert in just 30 minutes, leaving you plenty of time to enjoy other summer activities.
- Customizable Layers — Add different berries or substitute ingredients to create your own twist on this classic recipe without losing its essence.
- Great for Gatherings — This dish serves a crowd easily, making it an ideal choice for barbecues, picnics, or holiday celebrations.
Ingredients You’ll Need
Main Ingredients:
– 4 cups fresh strawberries, hulled and sliced — these provide sweetness and freshness in every layer.
– 2 cups heavy whipping cream, chilled — this is essential for creating fluffy whipped cream.
– 1/2 cup powdered sugar — sweetens the cream without adding graininess.
– 1 teaspoon vanilla extract — enhances the overall flavor of the whipped cream.
– 3 cups vanilla wafers (about 2 sleeves) — these soften overnight and create a cake-like texture.
– Optional: 1 cup fresh blueberries for garnish — adds color and an extra layer of flavor.
Smart Substitutions:
* Instead of heavy whipping cream: Use coconut cream — it will give your dessert a slight coconut flavor while still being creamy.
* Instead of powdered sugar: Try using maple syrup — it will add a unique taste but may change the consistency slightly.
* Instead of vanilla wafers: Use graham crackers — they will offer a slightly different texture but are equally delicious.
Pro Tip: Chill your mixing bowl and beaters before whipping the cream. This helps achieve stiff peaks faster.
How to Make Easy No-Bake Patriotic Strawberry Icebox Cake
Quick Prep Checklist:
* Prepare and slice strawberries ahead of time to save minutes during assembly.
* Chill your mixing bowl for whipping the cream at least 15 minutes prior.
Step 1: Prepare the Strawberries
Start by washing, hulling, and slicing about 4 cups of fresh strawberries. Set aside some whole or halved berries for garnishing later. They should look vibrant and juicy when you’re done with this step.
Tip: If your strawberries are particularly ripe, they’ll be sweeter but also can get mushy if left out too long.
Step 2: Whip the Cream
In a chilled large mixing bowl, pour in the heavy whipping cream. Add powdered sugar and vanilla extract before whipping with an electric mixer on medium-high speed until stiff peaks form, which takes about 3 to 5 minutes. The mixture should hold its shape well at this stage.
Watch For: You’ll know it’s ready when you lift the beaters out, and the peaks stand straight up without drooping.
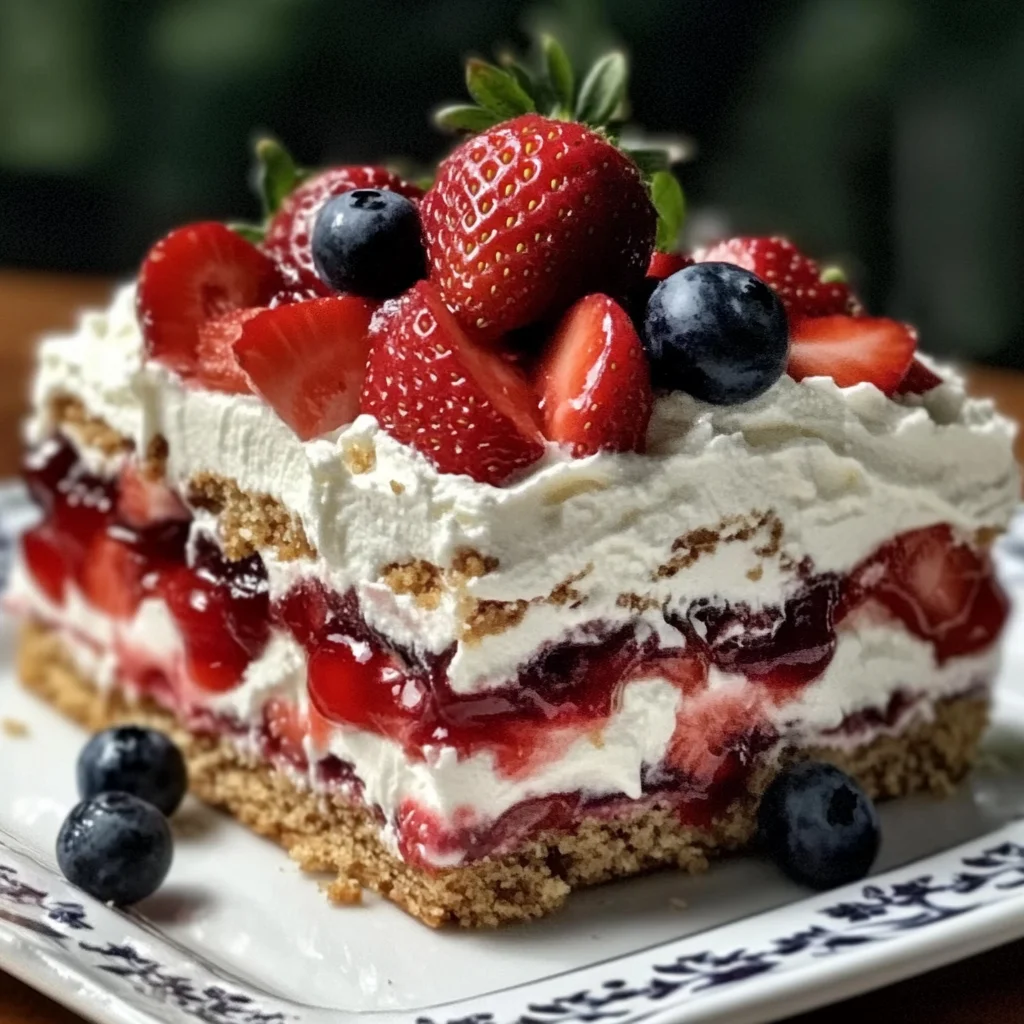
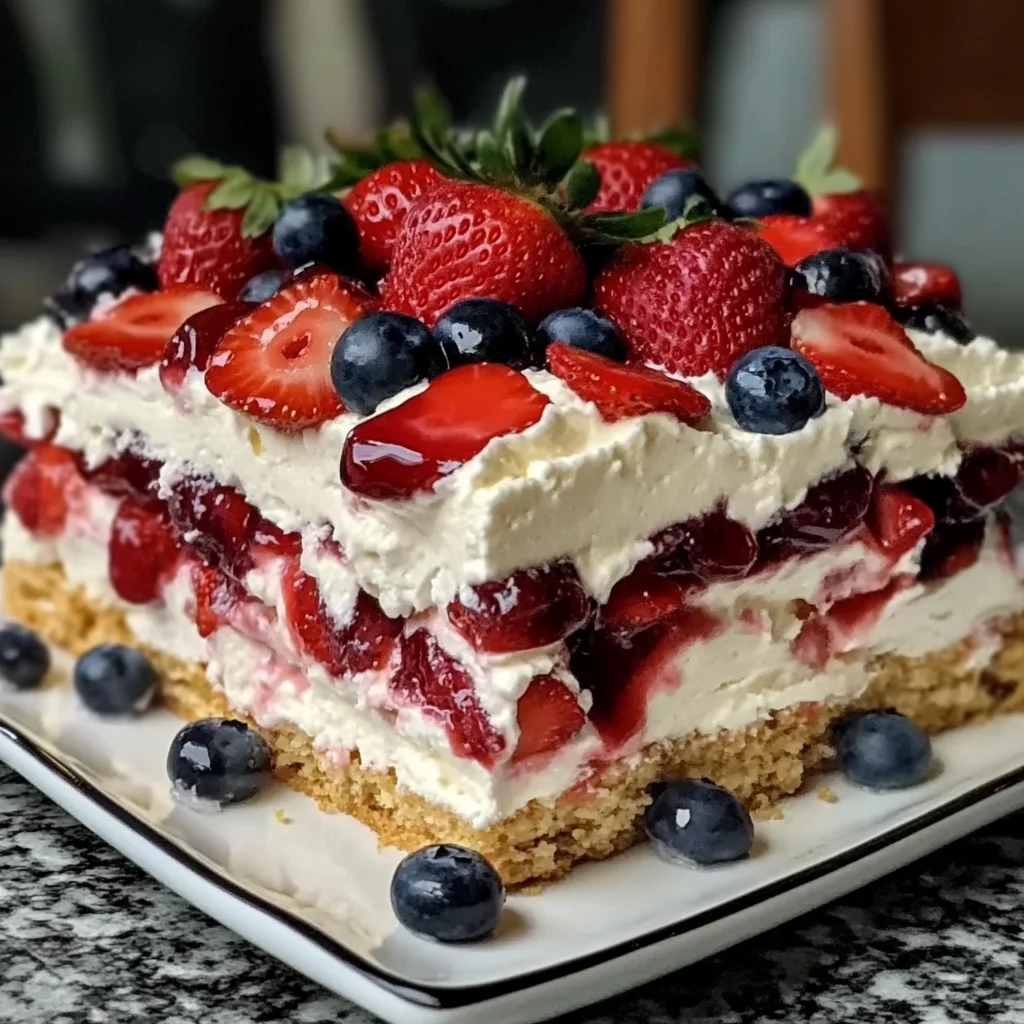
Step 3: Layer the Cake
Spread a thin layer of whipped cream on the bottom of a 9×13-inch dish as your base layer. Next, place a single layer of vanilla wafers evenly across the top. Spoon more whipped cream over these wafers followed by an even sprinkle of sliced strawberries on top. Repeat these layers until you’ve used all ingredients. Finish with a generous layer of whipped cream topped with reserved strawberries.
You’ll Know It’s Ready When: The final layer is smooth and looks invitingly topped with colorful fruit.
Step 4: Chill Overnight
Cover your assembled cake tightly with plastic wrap to prevent any off-flavors from seeping in during chilling time. Place it in the refrigerator for at least six hours; overnight is best so that flavors meld perfectly and wafers soften fully into creamy goodness.
Avoid peeking too soon; patience here pays off in texture!
Step 5: Serve
When ready to serve, take out your icebox cake from the fridge and slice into squares using a sharp knife—cleaning between cuts ensures neat servings each time. Optionally garnish each slice with blueberries or mint leaves if desired for added flair!
This adds brightness both visually and flavor-wise!
✅ Perfect Results Checklist:
* Layers should be distinct yet soft upon cutting through.
* Cream should feel light yet substantial when lifted onto forks.
* Each bite offers balanced sweetness from fruits along with creamy textures.
Expert Tips & Variations
3 Pro Tips:
* Use Fresh Strawberries: Choose ripe strawberries to enhance sweetness naturally; check firmness but avoid overly squishy ones as they won’t hold up well in layers.
* Don’t Overwhip Cream: If you whip past stiff peaks into butter-like consistency, you’ll lose that airy texture—stop once peaks hold firmly but remain smooth!
* Layer Wisely: When layering fruits between creams/wafers ensure even distribution; don’t overload one section as it may collapse when cutting later.
3 Variations to Try:
* Mixed Berry Delight: Substitute half of the strawberries with raspberries or blackberries—this gives varied tanginess alongside sweet notes.
* Chocolate Drizzle Version: Drizzle melted dark chocolate over layers before chilling—adds richness against lighter elements while keeping things fun!
* Coconut Twist: Replace half of the heavy cream with coconut milk—this gives tropical vibes while still maintaining great taste.
Common Mistakes to Avoid
Mistake #1: Overwhipping Cream
I learned the hard way that overwhipped cream turns grainy instead of fluffy. This happens because fat molecules clump together too much during beating processes leading towards butter formation instead! To avoid this mistake altogether stop beating right at stiff peak formation where mixtures appear glossy yet firm.
Mistake #2: Not Chilling Enough
Most home bakers miss this crucial step by not allowing their layered cakes enough chill time leading them to fall apart when cut too soon! Without adequate cooling periods flavors don’t meld properly nor do textures soften enough making eating messy rather than enjoyable! Always aim for at least six hours preferably overnight so everything has time together nicely.
Mistake #3: Skipping Garnish
I’ve seen many skip garnishing entirely which dulls presentation greatly despite deliciousness underneath! A simple touch like adding mint leaves boosts visual appeal significantly thus enticing guests before they’ve even taken their first bite! Always consider leaving room atop finished product specifically meant just for garnishes!
Storage & Reheating
Room Temperature: It’s best served cold but can sit out briefly during serving times without issue if kept cool initially beforehand!
Refrigerator: Store leftovers covered tightly; consume within three days maximum freshness-wise without compromising taste/texture quality overall!
Freezer: Wrap tightly in plastic wrap then foil; can freeze up two months although textures may vary post-thawing versus freshly made versions once thawed completely afterward!
Reheating:
* Oven: Preheat oven at low temp around 300°F heating just enough till warmed through (approx five minutes); restores softness while avoiding sogginess!
* Microwave: Use medium power level only heating small intervals ensuring not overheating causing melting issues; keep watch over contents closely until warmed through satisfactorily!
* Stovetop: Utilize non-stick pan set low heat placing lid atop ensuring moisture retention throughout warming process keeping things lovely!
Frequently Asked Questions
Can I use frozen fruit instead?
Yes, you can use frozen fruit instead of fresh ones—but ensure they’re thawed properly first else excess moisture could lead to undesired texture changes within layers!
How long does it last in the fridge?
Your batch typically lasts about three days stored correctly within airtight containers; after that point quality begins diminishing noticeably especially concerning texture against original state noted!
Can I make this dairy-free?
Absolutely! Simply swap heavy whipping cream out entirely replacing it either full-fat coconut milk or suitable plant-based alternative ensuring success remains intact throughout preparation phases!
Is there an easier way to prepare it?
While layering is essential here utilizing premade products like store-bought whipped topping simplifies matters greatly though adjustments must be made regarding sugar content accordingly based upon chosen brands used effectively throughout preparation stages overall!
Final Thoughts
You’re going to love how easy it is to whip up this delightful icebox treat whenever cravings hit! Enjoying simple desserts like Easy No-Bake Patriotic Strawberry Icebox Cake is what summer should be all about—lightness combined effortlessly with freshness plus satisfaction shared among friends/family alike!
Loved this recipe? Leave a comment below—I read every one! Rate it ⭐⭐⭐⭐⭐ and share it with a friend who’d love it.

Easy No-Bake Patriotic Strawberry Icebox Cake
Indulge in the refreshing layers of this Easy No-Bake Patriotic Strawberry Icebox Cake, where creamy whipped goodness meets sweet, juicy strawberries. Each slice offers a delightful balance of flavors and textures, with soft wafers that melt in your mouth and vibrant berries that burst with freshness. Perfect for summer gatherings, this dessert is not only simple to make but also highly customizable—feel free to swap in your favorite fruits or toppings!
- Total Time: 30 minutes
- Yield: 12 servings 1x
Ingredients
- 4 cups fresh strawberries, hulled and sliced
- 2 cups coconut cream, chilled
- 1/2 cup maple syrup
- 1 teaspoon vanilla extract
- 3 cups vanilla wafers (or graham crackers)
- 1 cup fresh blueberries for garnish (optional)
Instructions
- Wash, hull, and slice the strawberries, setting aside some whole or halved for garnishing later. The vibrant color and juiciness will elevate your dessert.
- In a chilled mixing bowl, combine the coconut cream, maple syrup, and vanilla extract. Whip on medium-high speed until stiff peaks form, about 3 to 5 minutes; the mixture should hold its shape beautifully.
- Spread a thin layer of whipped cream at the bottom of a 9×13-inch dish as your base layer. Place a layer of vanilla wafers evenly on top before spooning more whipped cream and adding sliced strawberries.
- Continue layering whipped cream, wafers, and strawberries until all ingredients are used up. Finish with a generous layer of whipped cream topped with reserved strawberries.
- Cover tightly with plastic wrap and chill in the refrigerator for at least six hours or overnight to allow flavors to meld and wafers to soften.
- Prep Time: 30 minutes
- Cook Time: 0 minutes
- Category: Dessert
- Method: No-bake
- Cuisine: American
Nutrition
- Serving Size: 1 square (120g)
- Calories: 320
- Sugar: 18g
- Sodium: 90mg
- Fat: 20g
- Saturated Fat: 12g
- Unsaturated Fat: 6g
- Trans Fat: 0g
- Carbohydrates: 32g
- Fiber: 2g
- Protein: 3g
- Cholesterol: 0mg