
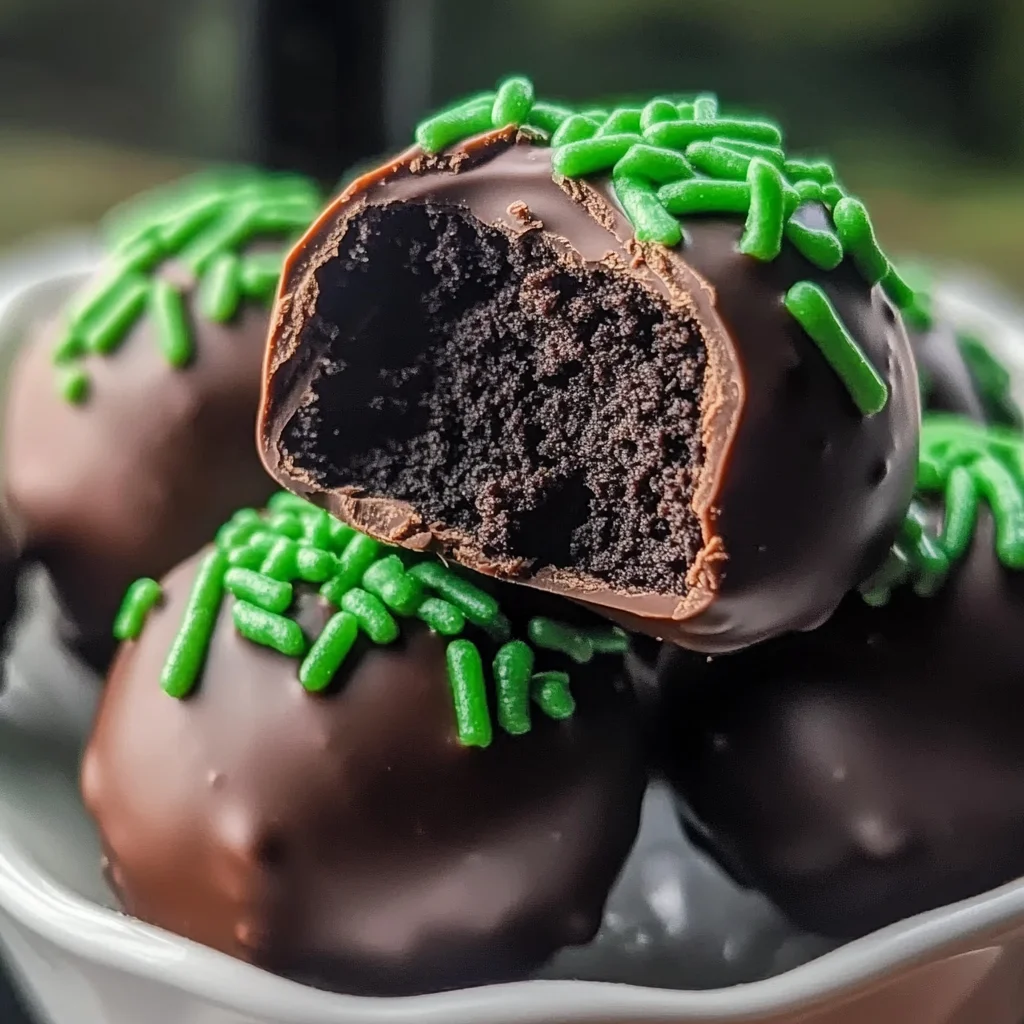
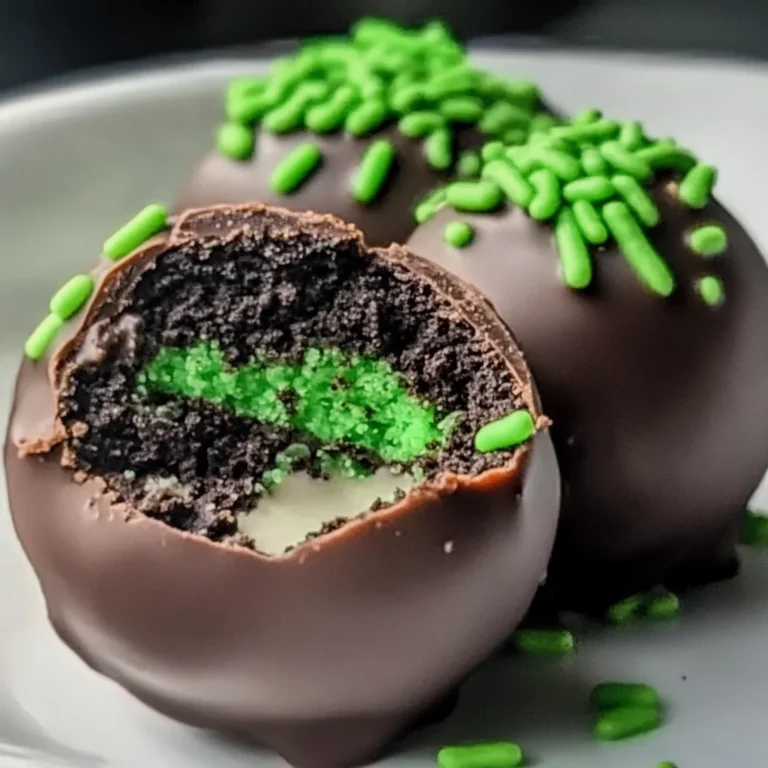
I’ve always loved treats that are both fun and easy to make, especially around holidays. St. Patrick’s Day Mint Oreo Balls are just that — festive, no-bake delights that combine the classic flavors of Oreos and mint. After testing different chocolate coatings and sprinkles, I discovered a few tricks that really make this recipe shine. In this article, you’ll find everything you need to whip up a delightful batch for your celebrations.
Why You’ll Love This Recipe
- No-Bake Convenience — These treats come together quickly without needing an oven, making cleanup a breeze.
- Minty Freshness — The mint extract brings a refreshing flavor that balances perfectly with the sweetness of the Oreos.
- Customizable Coating — You can swap out dark chocolate for milk or white chocolate if you prefer a different flavor profile.
- Fun Texture — The cream cheese adds a creamy richness that complements the crunchy cookie texture.
- Perfect for Parties — These mint-flavored balls are great for sharing and will impress guests with their festive look.

Ingredients You’ll Need
Main Ingredients:
– * Oreo cookies: 1 package (15.25 oz) — provides the base flavor and crunch.
– * Cream cheese: 8 oz, softened — adds creaminess and binds the mixture together.
– * Mint extract: ½ tsp — gives a refreshing minty flavor.
– * Chocolate: 8 oz dark or semi-sweet, chopped — coats the balls for rich chocolate flavor.
– * Green sprinkles: ½ cup — adds a festive touch for St. Patrick’s Day.
Smart Substitutions:
* Instead of cream cheese: Use vegan cream cheese — it offers similar texture while keeping it dairy-free.
* Instead of dark chocolate: Use white chocolate chips — they will give a sweeter coating with a beautiful contrast against the green sprinkles.
* Instead of green sprinkles: Try crushed peppermint candies — they’ll add extra crunch and enhance the mint flavor.
Pro Tip: When buying cream cheese, check that it’s at room temperature before using; this makes mixing smoother and ensures no lumps in your mixture.
How to Make St. Patrick’s Day Mint Oreo Balls
Quick Prep Checklist:
* Gather all ingredients before starting to streamline your process.
* Prepare your baking sheet by lining it with parchment paper.
Step 1: Crush the Cookies
Start by placing the Oreo cookies in a food processor. Pulse until you have fine crumbs resembling sand; this usually takes about 30 seconds.
Tip: Make sure there are no large chunks left since they won’t mix well with the cream cheese.
Step 2: Mix it Up
In a mixing bowl, combine your crushed Oreos with softened cream cheese and mint extract. Stir until fully blended; it should form a thick dough-like mixture that’s smooth in texture.
Watch For: The mixture should hold its shape when rolled into balls without crumbling apart.
Step 3: Shape Your Balls
Take about one tablespoon of the mixture and roll it into 1-inch balls with your hands. Place them on your lined baking sheet as you go along.
You’ll Know It’s Ready When: Each ball is smooth on all sides without any cracks showing through.
Step 4: Chill Out
Refrigerate the shaped balls for at least 30 minutes until firm; this helps them maintain their shape during coating.
I learned the hard way that skipping this step leads to messy coatings!
Step 5: Coat Your Treats
Melt your chopped chocolate in a microwave-safe bowl using short intervals, stirring after each until smooth. Dip each chilled ball into the melted chocolate, shaking off excess before placing them back onto parchment paper.
Be quick so that you can sprinkle green decorations on top before the chocolate sets!
✅ Perfect Results Checklist:
* Each ball should be uniformly coated in chocolate without bare spots.
* They should feel firm but slightly soft inside once bitten into.
* Expect a nice balance between creamy filling and crunchy exterior.
Expert Tips & Variations
3 Pro Tips:
* Chill Thoroughly:* Chilling after rolling helps keep their shape during dipping; don’t rush this step!
* Use Quality Chocolate: Higher cocoa content enhances flavor. Avoid cheap chocolates as they may not melt smoothly.
* Double-Dip if Desired: For an extra layer of chocolate goodness, dip each ball twice allowing time to set between layers.
3 Variations to Try:
* Peanut Butter Oreo Balls: Substitute half of the cream cheese for peanut butter for a nutty twist on these treats.
* White Chocolate Drizzle Version: Use white chocolate to drizzle over dark-coated balls for added visual appeal and sweetness.
* Rainbow Sprinkles Variant: Swap out green sprinkles for rainbow ones to celebrate any occasion!
Common Mistakes to Avoid
Mistake #1: Poor Mixing
When not mixed thoroughly, some Oreo pieces remain chunky while others turn too mushy. This happens because uneven mixing fails to incorporate all ingredients properly. Ensure you mix until completely uniform throughout before shaping.
Mistake #2: Chocolate Seizing
If your melting chocolate becomes grainy or hardens unexpectedly, it’s likely overheated or had moisture introduced during melting. Always use low power settings in intervals when melting; stop as soon as it starts melting smoothly.
Mistake #3: Not Chilling Long Enough
Skipping sufficient chill time results in soft balls falling apart when dipped in chocolate or losing shape entirely during serving. Always stick to at least 30 minutes chilling time after shaping before coating them.
Storage & Reheating
Room Temperature: Store at room temperature for up to two hours if serving at parties.
Refrigerator: Keep extras in an airtight container for up to one week; they taste best chilled!
Freezer: Wrap tightly in plastic wrap followed by aluminum foil and freeze for up to three months without losing freshness or flavor.
Reheating:
* Oven: Preheat oven to 350°F (175°C), warm them directly on baking sheet for about five minutes just enough to soften outside layers while keeping inside cool.
- Microwave: Set at medium power level heating briefly—around ten seconds—while checking frequently so they don’t melt completely away!
Frequently Asked Questions
Can I use other cookie types besides Oreos?
Yes! Any sandwich-style cookie will work well here; just adjust sugar levels based on sweetness levels of alternative cookies used.
How can I make these dairy-free?
By substituting regular cream cheese with plant-based versions like cashew cream or almond milk cheeses available in stores nowadays keeps everything delicious yet suitable!
Can I add nuts or toppings?
Absolutely! Chopped nuts like walnuts or pecans add crunchiness but consider how they pair with other flavors; always mix them into dough evenly beforehand.
How long do leftovers last?
These brownies will last about one week stored properly in an airtight container within refrigeration ensuring freshness stays intact longer while flavors deepen over time!
Final Thoughts
If you’re looking to satisfy that sweet tooth around St. Patrick’s Day, this recipe is just what you need! Whipping up these Mint Oreo Balls is straightforward and guarantees smiles all around when shared with friends and family.
Loved this recipe? Leave a comment below—I read every one! Rate it ⭐⭐⭐⭐⭐ and share it with anyone who’d enjoy trying out these fun St. Patrick’s Day Mint Oreo Balls!
St. Patrick’s Day Mint Oreo Balls
Indulge in the delightful taste of St. Patrick’s Day Mint Oreo Balls, a no-bake treat that combines the rich flavors of Oreos with refreshing mint. As you bite into these creamy delights, the smooth chocolate coating melts in your mouth while the crunchy cookie center offers a satisfying texture. Perfect for sharing at festive gatherings, these treats can be easily customized with your choice of sprinkles or chocolate coatings.
- Total Time: 20 minutes
- Yield: 24 servings 1x
Ingredients
- 1 package Oreo cookies (15.25 oz)
- 8 oz cream cheese, softened
- ½ tsp mint extract
- 8 oz chocolate, chopped (dark or semi-sweet)
- ½ cup green sprinkles
Instructions
- Crush the Oreo cookies in a food processor until they resemble fine crumbs, about 30 seconds; ensure there are no large chunks.
- In a mixing bowl, blend the crushed Oreos with softened cream cheese and mint extract until smooth and dough-like; it should hold its shape when rolled.
- Roll the mixture into 1-inch balls using about one tablespoon for each; place them on a lined baking sheet as you go.
- Refrigerate the balls for at least 30 minutes to firm up, ensuring they maintain their shape during coating.
- Melt the chopped chocolate in a microwave-safe bowl in short intervals, stirring until smooth; dip each chilled ball into the chocolate and place them back on parchment paper before sprinkling with green decorations.
- Prep Time: 20 minutes
- Cook Time: 0 minutes
- Category: Dessert
- Method: No-bake
- Cuisine: American
Nutrition
- Serving Size: 1 ball (20g)
- Calories: 90
- Sugar: 7g
- Sodium: 50mg
- Fat: 5g
- Saturated Fat: 2g
- Unsaturated Fat: 3g
- Trans Fat: 0g
- Carbohydrates: 10g
- Fiber: 0g
- Protein: 1g
- Cholesterol: 10mg